April was the Women's Getaway Weekend for my church and the theme this year was Called to Love. I created the artwork for the gallery wall that was full of love scriptures and quotes. Some lucky attendees were awarded a print by a sticker being randomly placed under their chairs. Although I couldn't hang the artwork on the wall at the hotel how I wanted, we made due and they still looked cute. One of my favorite prints was the one I made with supplies that I had lying around my office. It's super simple and you can switch out any of the materials to whatever you have on hand.
Tassels {how to}
I feel like tassels are a hot trend right now, I'm seeing them everywhere and they look so cute on so many different applications. They can be quite expensive if you buy them and it's just yarn or floss, I mean really. I'm pretty crafty so I put together a simple step by step "how to" to make your own.
SUPPLIES :: Scissors, pliers, cord, embroidery floss {yarn or crochet thread works too}, jewelry Lobster Clasps and jewelry Jump Rings.
TIP :: You may also want to try jewelry Split Rings, I found those to work a little easier than the Jump Rings {and you won't need pliers for them}
STEP 1 :: Fold your floss or yarn back and forth to make a nice little pile keeping in mind the length of the tassel once you fold the floss in half. The embroidery thread was perfect straight from the package. If you're folding your own, a playing card will work good to fold over. The thickness of your tassel should be dependent of how big your Jump Rings are. If you fold too much floss, it might not fit through the ring. If you're using another type of yarn than embroidery floss, use the floss as a guide to gauge how many times you can fold it over.
STEP 2 :: Place the entire bundle of floss through the Jump Ring and stop with the ring in the center of your bundle.
STEP 3 :: Fold the floss over the ring making sure that the end are even {as much as possible}.
STEP 4 :: Now take the cord and wrap it around the bundle close to the top by the Jump Ring. Wrap it snugly and enough times around that it will hold the floss tightly. Tie it off with a double knot.
TIP :: You can use any floss, cord or yarn to tie it off, it's whatever you prefer. I like to use a coordinating color, but you can use the same material and color as well.
STEP 5 :: Using your scissors, cut off the extra cord from tying the double knot and cut the bottoms of each bundle of floss to the length you want your tassel. I cut some shorter than others to have a variety of lengths.
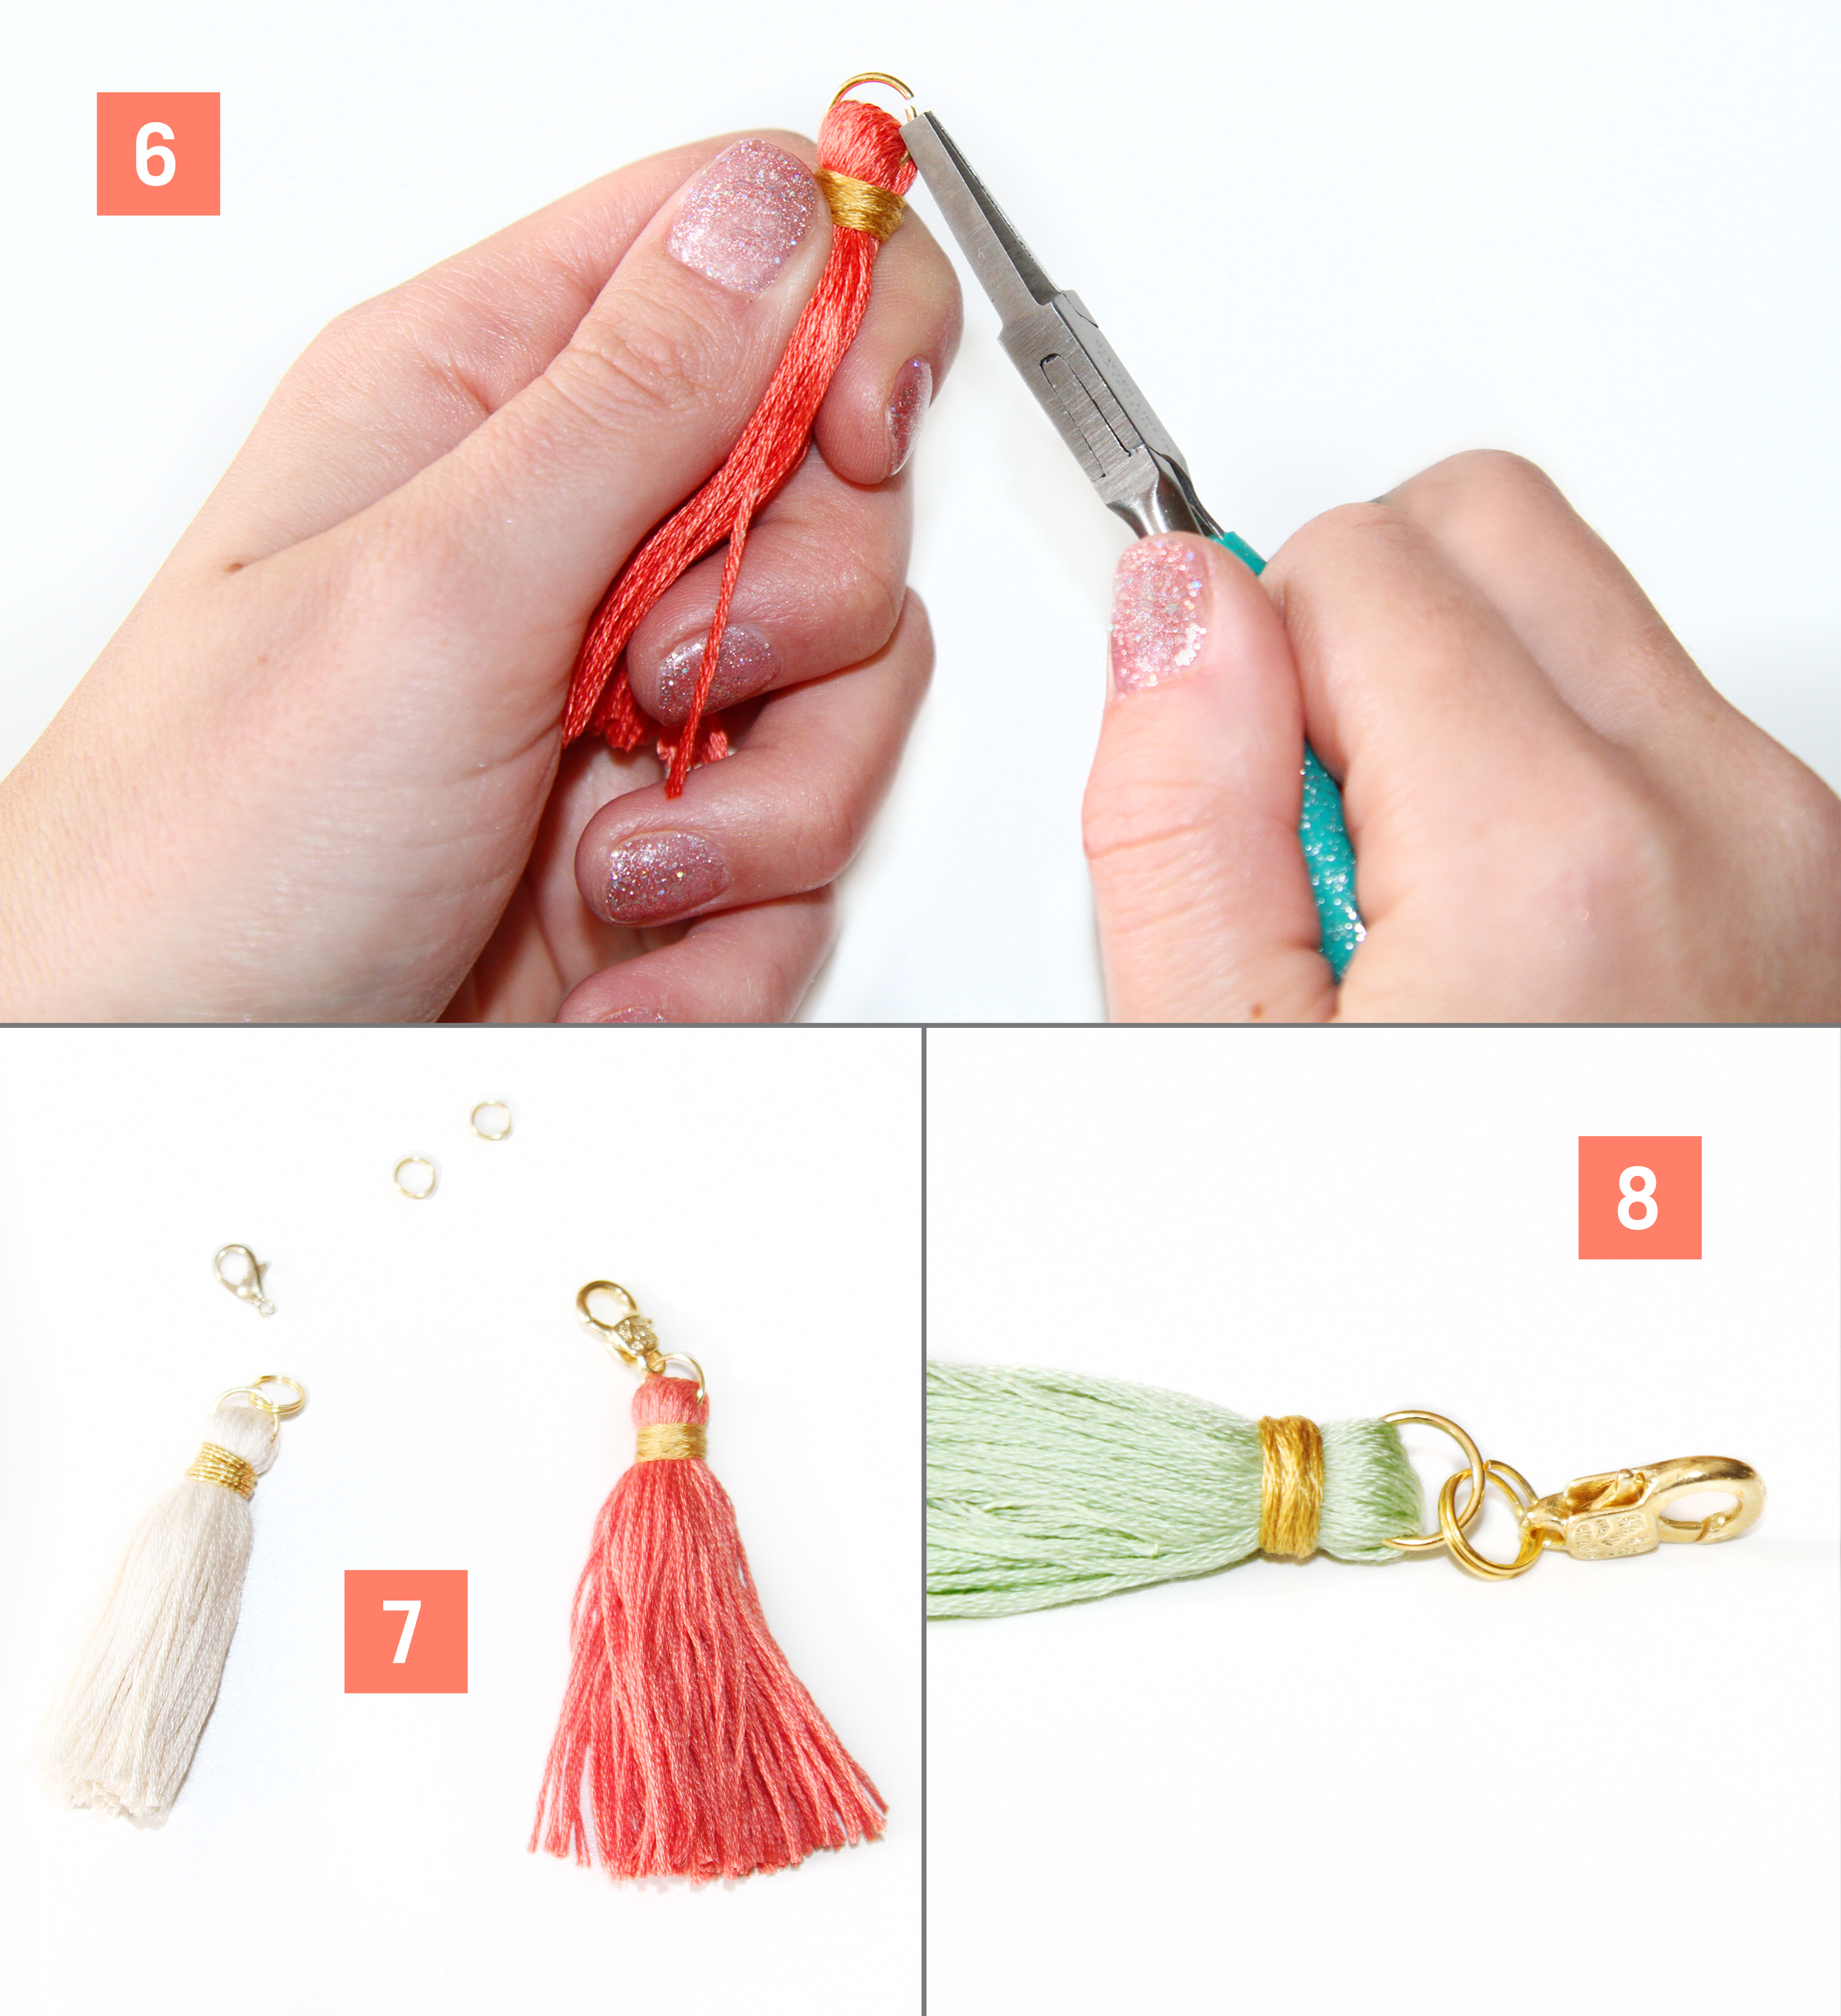
STEP 6 :: If you're using Jump Rings, take your pliers and pull it open.
TIP :: Be sure to pull one side of the ring toward you and the other side away from you {not apart}, this will make it easy for the ring to return to its original shape.
STEP 7 :: Thread the open Jump Ring onto the Jump Ring that is attached to the tassel. If you're using Split Rings, they work just like a key ring. Split the ring open and thread it onto the Jump Ring.
STEP 8 :: Add the Lobster Clasp to either the Jump Ring or Split Ring. Use the pliers to close the Jump Ring by pushing both ends back to the center {opposite of how you opened it}.
Here is a closer look of the tassels in two different sizes of tassels. Adding the Lobster Clasp enables you to accessorize with your tassels in many ways.
I show examples of the tassel used as a necklace {on my adorable daughter} or added to a journal. I also used the tassels on a zipper pull of a wallet.
These are pretty easy to make and the possibilities are endless for their use. I hope you have fun making these yourself. Let me know if you have any questions. Enjoy!


