5 Easy Tips to Build Your Brand While Not Quitting Your Day Job

5 Easy Tips to Build Your Brand While Not Quitting Your Day Job

There seems to be a cultural shift with the big box stores all having similar items for sale made from over seas to a new trend of using creative makers from across our good ol’ US of A getting in on a piece of the action. More and more avenues are opening up to the independent designer, this is great news as a whole, but success doesn’t happen over night for most brands. Some of us still rely on making a living the old fashioned way with a full time or close to full time job and moonlighting as our brand’s designer, marketer, blogger and so on.

There is a strategy to building your brand successfully while juggling the most demanding of jobs as long as there is plenty of room for organization, discipline and determination. Every decision you make is fundamental to building your brand and taking it to the next level. Here are 5 easy steps you can follow

Telephone Print {how to}

Telephone Print {how to}

April was the Women's Getaway Weekend for my church and the theme this year was Called to Love. I created the artwork for the gallery wall that was full of love scriptures and quotes. Some lucky attendees were awarded a print by a sticker being randomly placed under their chairs. Although I couldn't hang the artwork on the wall at the hotel how I wanted, we made due and they still looked cute. One of my favorite prints was the one I made with supplies that I had lying around my office. It's super simple and you can switch out any of the materials to whatever you have on hand.

God Knows The Date

God Knows The Date

GETTING THROUGH GRIEF AND WHAT I'M LEARNING ALONG THE WAY.

For the second year in a row, it starts at prom season, I catch myself playing back events all the way through to June 21st. I can sense it starting because there is an anxiety that forms in my chest, no matter what I do, I know how the countdown ends. Grief is not linear. What I mean is once you feel or {think} you get through one emotion, it doesn’t mean you’ve dealt with it and won’t feel it again. It's a process I don't think I'll ever fully get through.

How To Create A Clean & Simple Inspiration Board

How To Create A Clean & Simple Inspiration Board

Inspiration boards are the starting point of every design project I create for my business. For me, it is a fundamental step in the creative process to visually and effectively communicate with my clients that sometimes words simply can’t do, it establishes the aesthetic feel from the outset of the design project. This can prove to be a huge time saver with revisions later on, it ensures the client that we're on the same page as far as the direction of the project. I also use the inspiration board as an intuitive way to brainstorm and organize my research.

Tassels {how to}

I feel like tassels are a hot trend right now, I'm seeing them everywhere and they look so cute on so many different applications. They can be quite expensive if you buy them and it's just yarn or floss, I mean really. I'm pretty crafty so I put together a simple step by step "how to" to make your own.

cover.jpg

SUPPLIES :: Scissors, pliers, cord, embroidery floss {yarn or crochet thread works too}, jewelry Lobster Clasps and jewelry Jump Rings.

TIP :: You may also want to try jewelry Split Rings, I found those to work a little easier than the Jump Rings {and you won't need pliers for them}

supplies.jpg

STEP 1 :: Fold your floss or yarn back and forth to make a nice little pile keeping in mind the length of the tassel once you fold the floss in half. The embroidery thread was perfect straight from the package. If you're folding your own, a playing card will work good to fold over. The thickness of your tassel should be dependent of how big your Jump Rings are. If you fold too much floss, it might not fit through the ring. If you're using another type of yarn than embroidery floss, use the floss as a guide to gauge how many times you can fold it over.

STEP 2 :: Place the entire bundle of floss through the Jump Ring and stop with the ring in the center of your bundle.

STEP 3 :: Fold the floss over the ring making sure that the end are even {as much as possible}.

STEP 4 :: Now take the cord and wrap it around the bundle close to the top by the Jump Ring. Wrap it snugly and enough times around that it will hold the floss tightly. Tie it off with a double knot.

TIP :: You can use any floss, cord or yarn to tie it off, it's whatever you prefer. I like to use a coordinating color, but you can use the same material and color as well.

Instructions_pt1.jpg

STEP 5 :: Using your scissors, cut off the extra cord from tying the double knot and cut the bottoms of each bundle of floss to the length you want your tassel. I cut some shorter than others to have a variety of lengths.

Cut.jpg

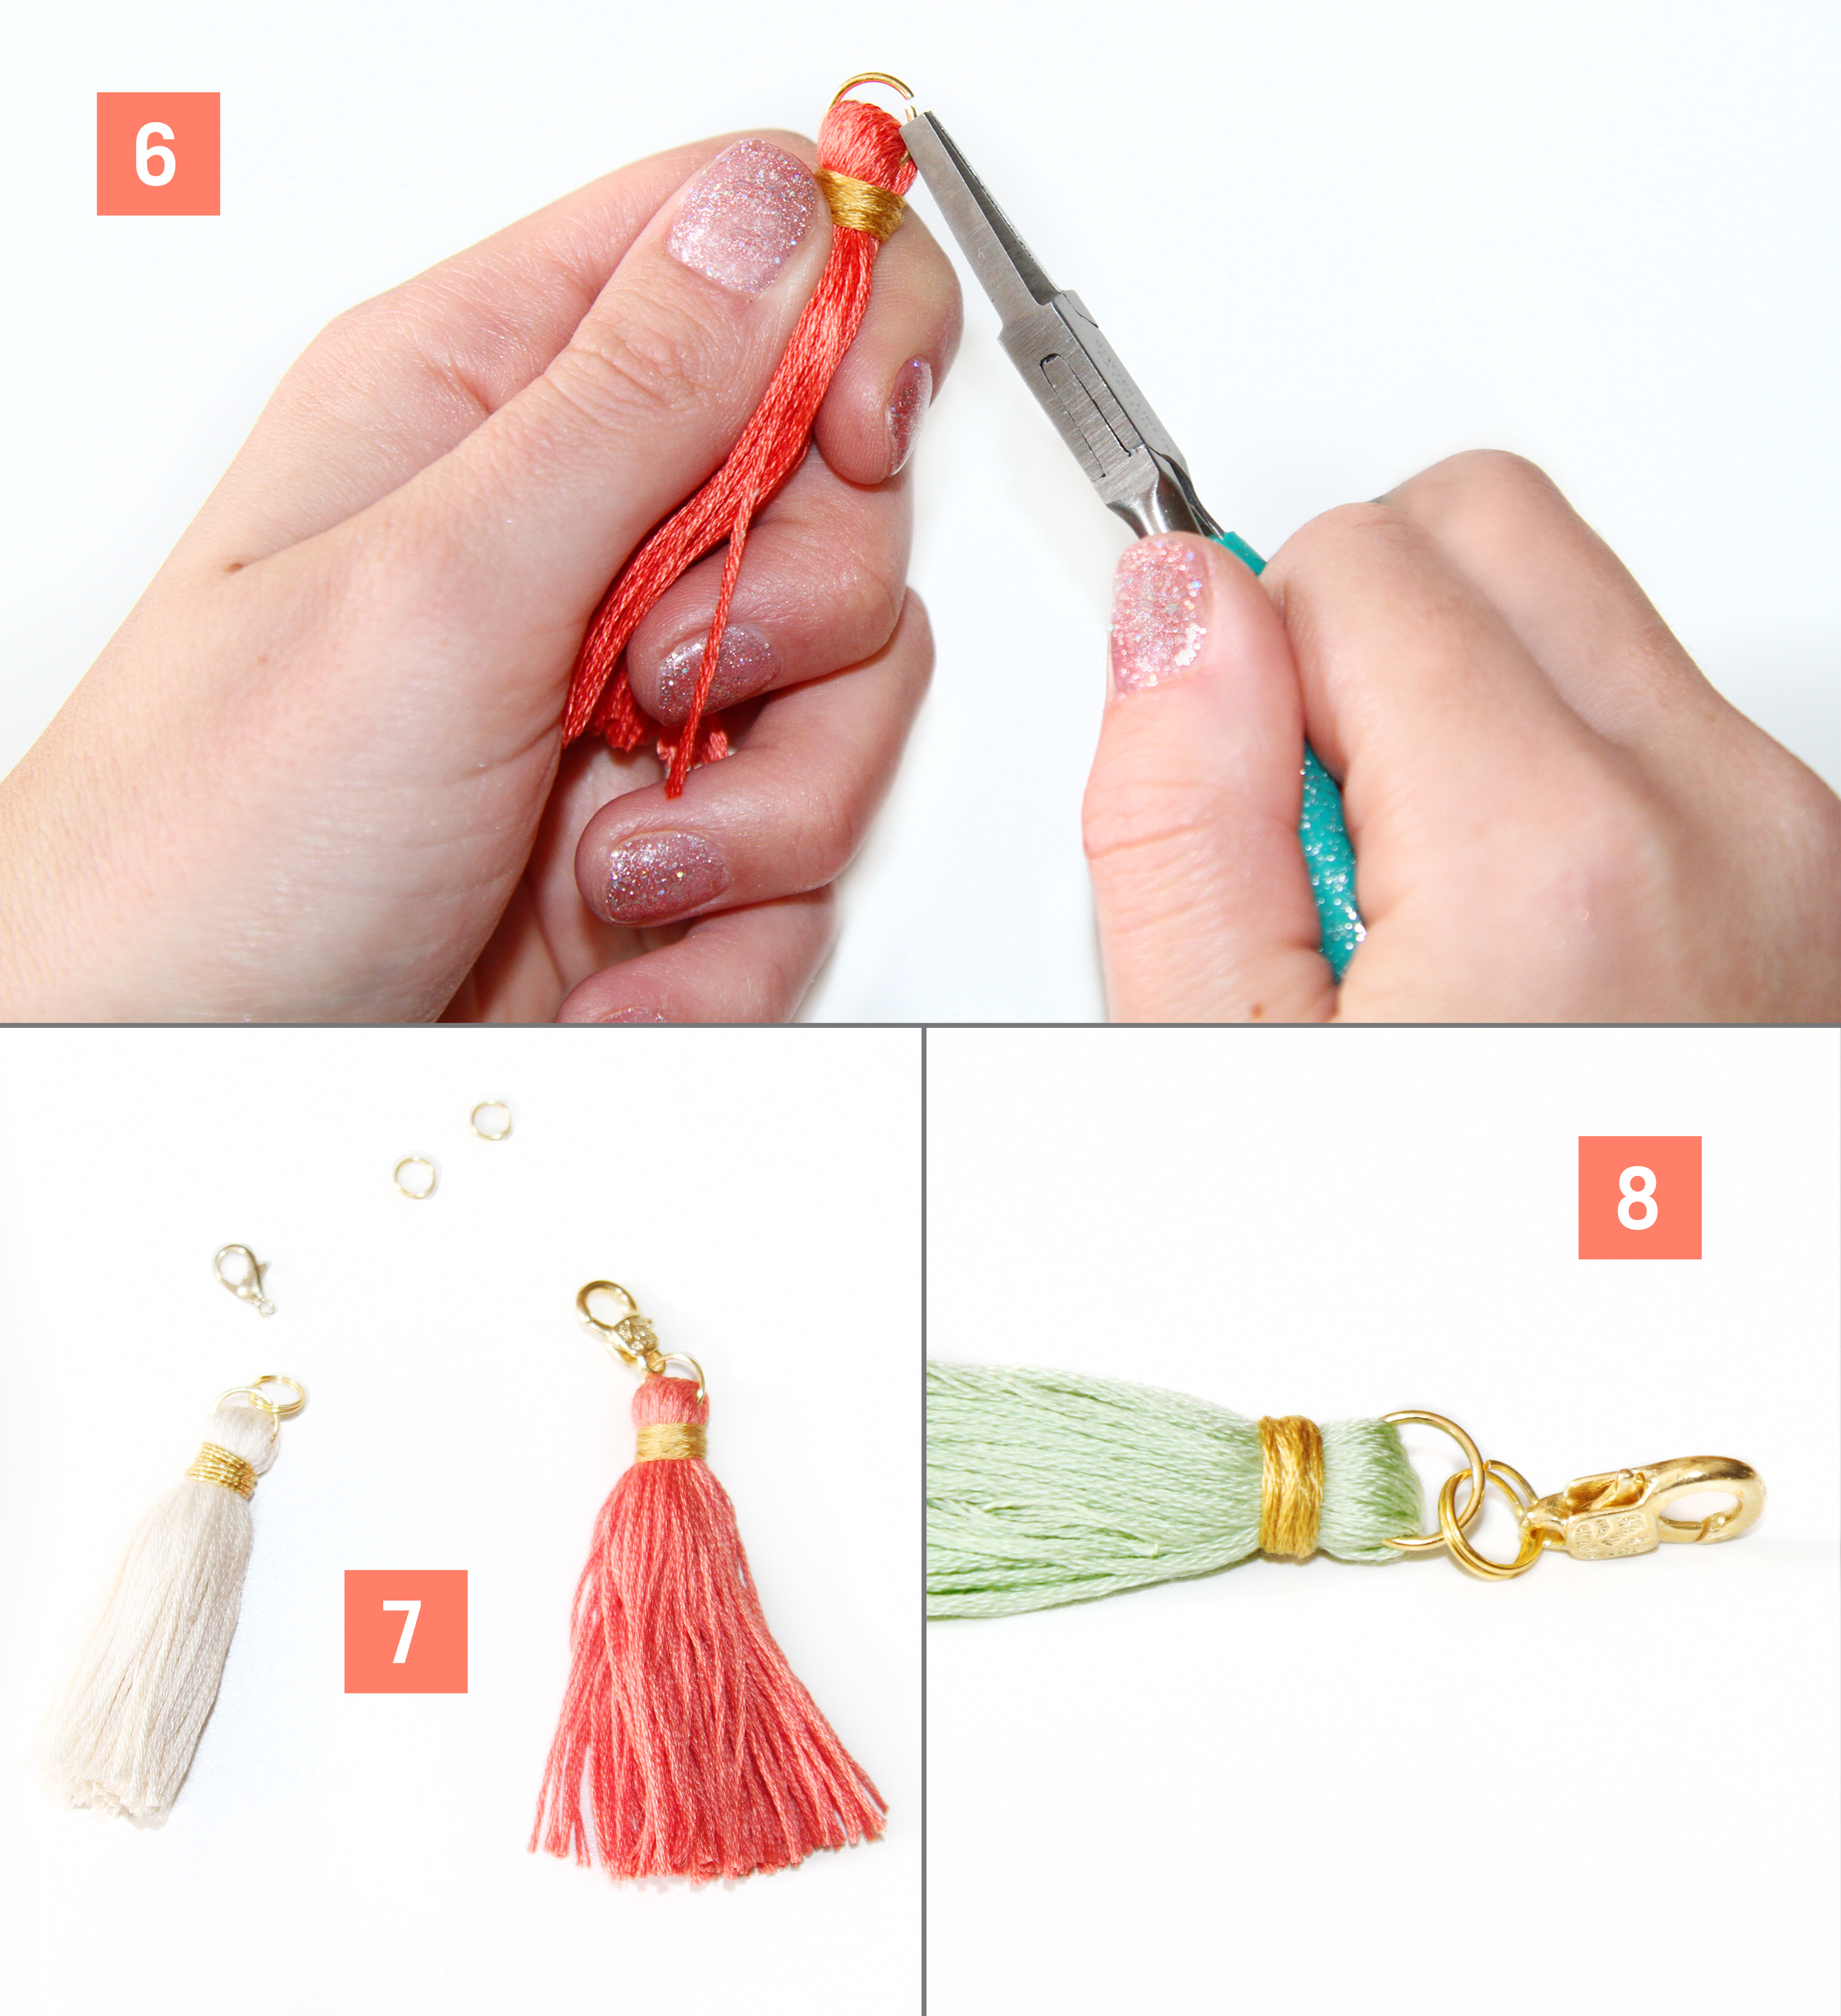
STEP 6 :: If you're using Jump Rings, take your pliers and pull it open.

TIP :: Be sure to pull one side of the ring toward you and the other side away from you {not apart}, this will make it easy for the ring to return to its original shape.

STEP 7 :: Thread the open Jump Ring onto the Jump Ring that is attached to the tassel. If you're using Split Rings, they work just like a key ring. Split the ring open and thread it onto the Jump Ring.

STEP 8 :: Add the Lobster Clasp to either the Jump Ring or Split Ring. Use the pliers to close the Jump Ring by pushing both ends back to the center {opposite of how you opened it}.

Jump_Hooks.jpg

Here is a closer look of the tassels in two different sizes of tassels. Adding the Lobster Clasp enables you to accessorize with your tassels in many ways. 

Finished_Product.jpg

I show examples of the tassel used as a necklace {on my adorable daughter} or added to a journal. I also used the tassels on a zipper pull of a wallet. 

court.jpg
Glam_wallet.jpg

These are pretty easy to make and the possibilities are endless for their use. I hope you have fun making these yourself. Let me know if you have any questions. Enjoy!

How's Your Son Doing?

How's Your Son Doing?

Today was the first day of Women's Bible Study and I worked the registration table with a woman who used to be my table leader about 3 years ago. I've seen her around church and occasionally would see a post or two online. When there was a lull in the flow of excited women checking to see if we received their registration, there it came....BOOM! I call these moments landmines. She asked me "how my son was doing." That moment was as if time froze for a second and I could hear my heart beat, like it does in the movies at a dramatic moment. I was so hurt, shocked and confused in a matter of 2 seconds flat. I think I felt more horrible for her asking that question then she did herself. The last thing I wanted to do was for her to feel uncomfortable or embarrassed, so I said what sounded like slow motion talking, "he passed away last year." She apologized but continued the awkward conversation by asking how. I mustered up everything I had inside to answer her and told her, but when it came out, it sounded way too bubbly. To me. Thank goodness more women walked up to check-in so the conversation quickly came to a halt.